

Circles and Arcs are quite important AutoCAD Objects. Working with them is a bit challenging at the beginning, however, with time they start to make a lot of sense! We have older arc/circle-related topics that can be very useful for you. Just like the one where we explain 3 Ways to Convert Circle to Polyline in AutoCAD, Draw Tangent Line in AutoCAD, or How to Draw Circle Tangent to Two Lines/Circles. In this post, we will look at some new fascinating Arc tricks that will definitely come in handy in moments of need! So without further ado, let’s get into the first one!
How to Draw Bisector of an Angle in AutoCAD using an Arc
The first Arc Trick that we are going to learn is Drawing Bisector in AutoCAD for any angle!
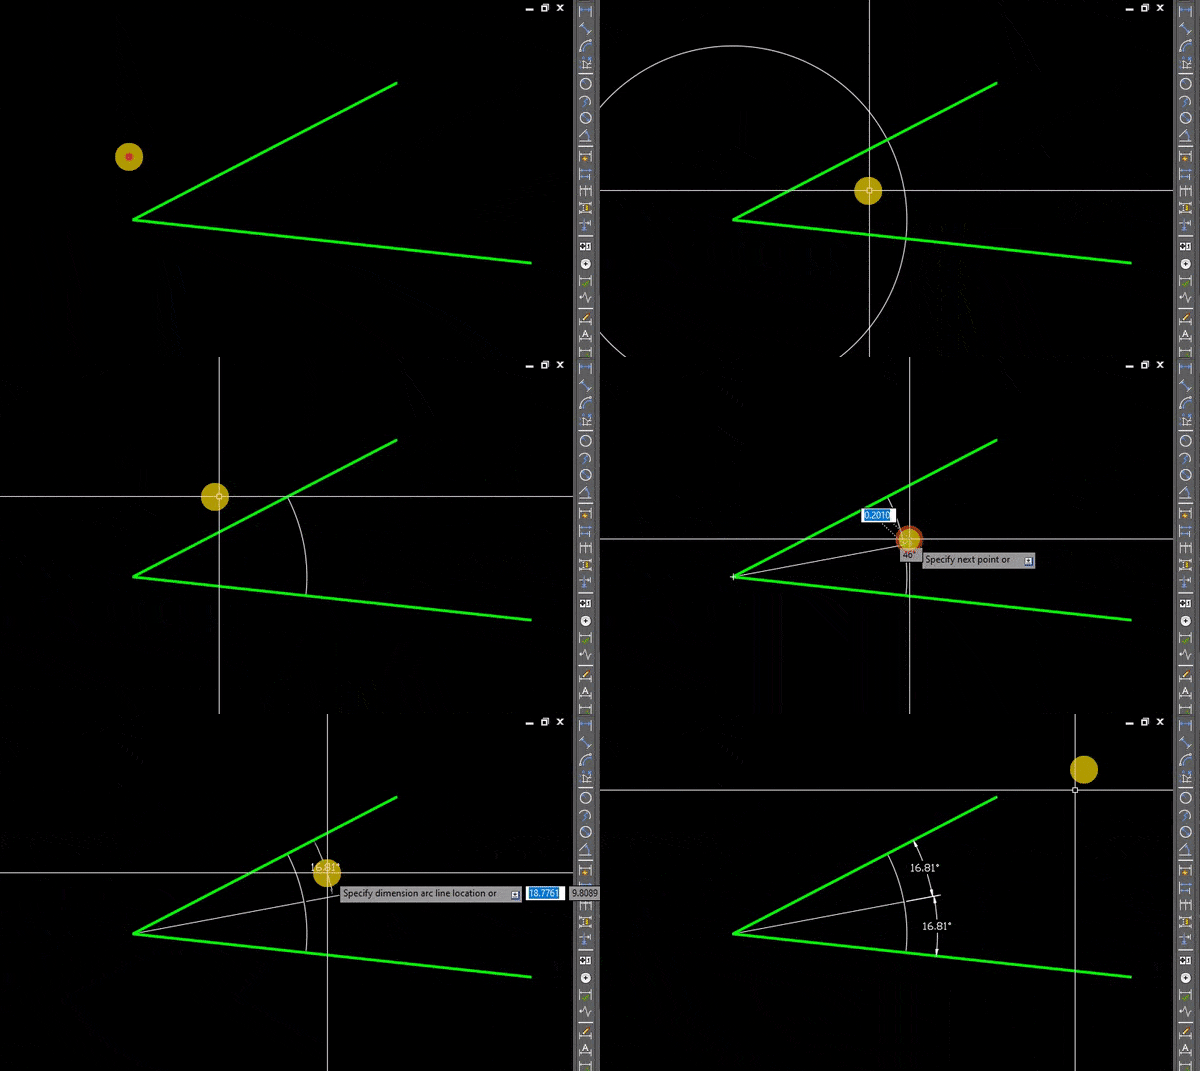
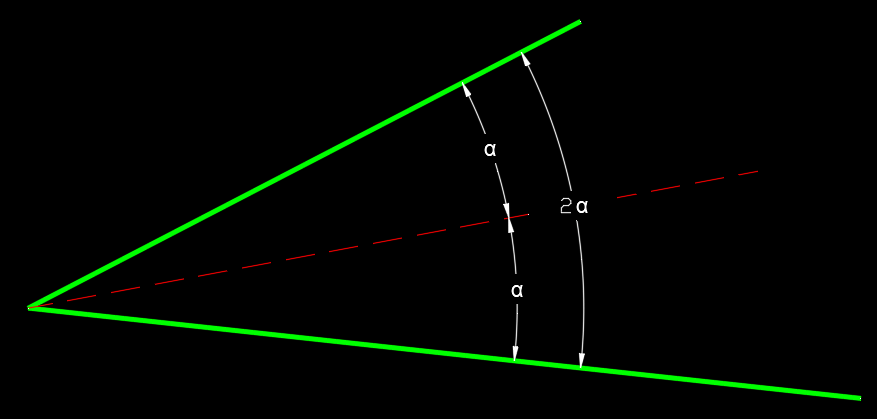 To draw Bisector in AutoCAD, Follow the steps below:
- Draw a Circle with Center at the intersection of the two Lines.
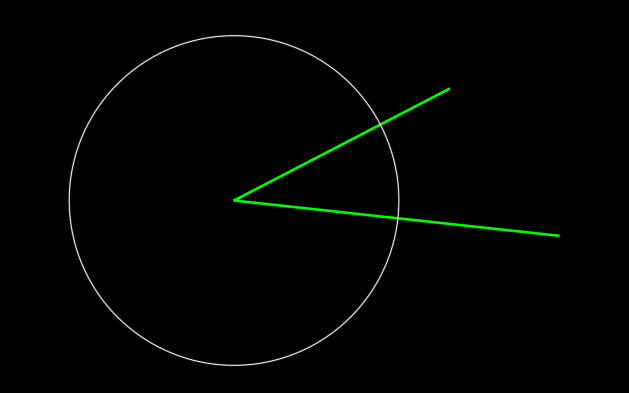
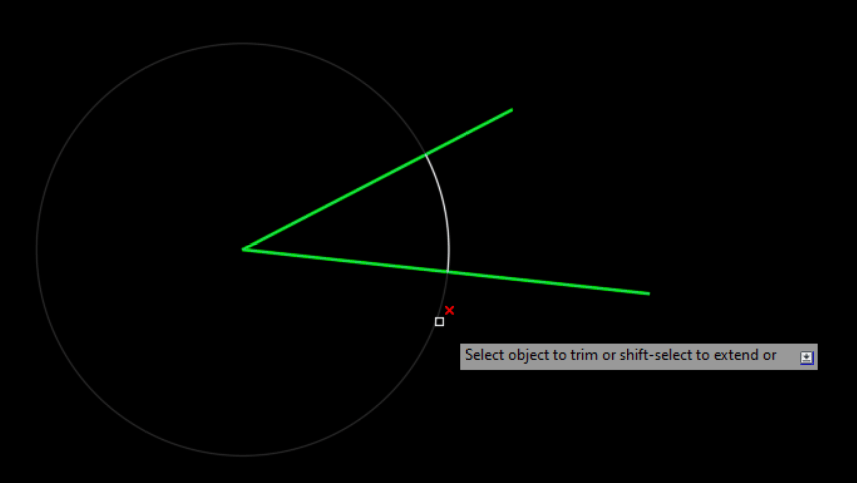
- Use Trim to erase the outter part of the drawn Circle.
- Draw a Line starting from the intersection of the two original lines (Circle Center), and ending at the Middle of the new Arc.
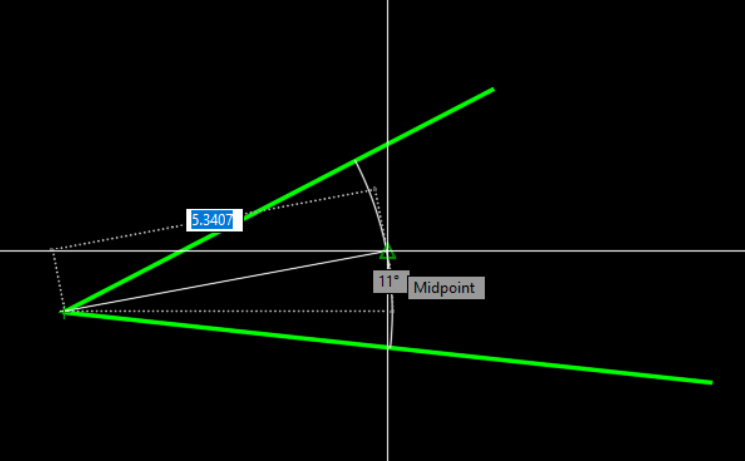
The last line you’ve drawn is the bisector of the Angle!
Draw the Point of Intersection of Arc Tangents
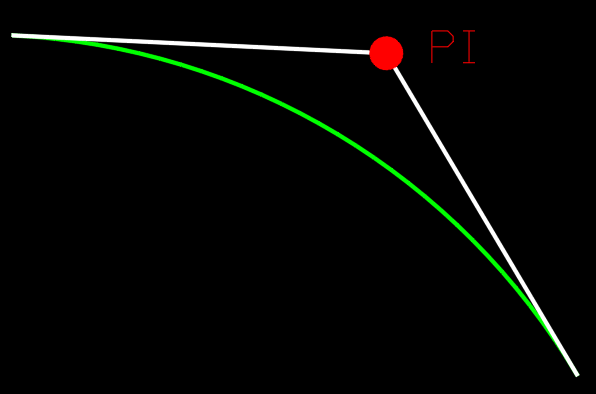
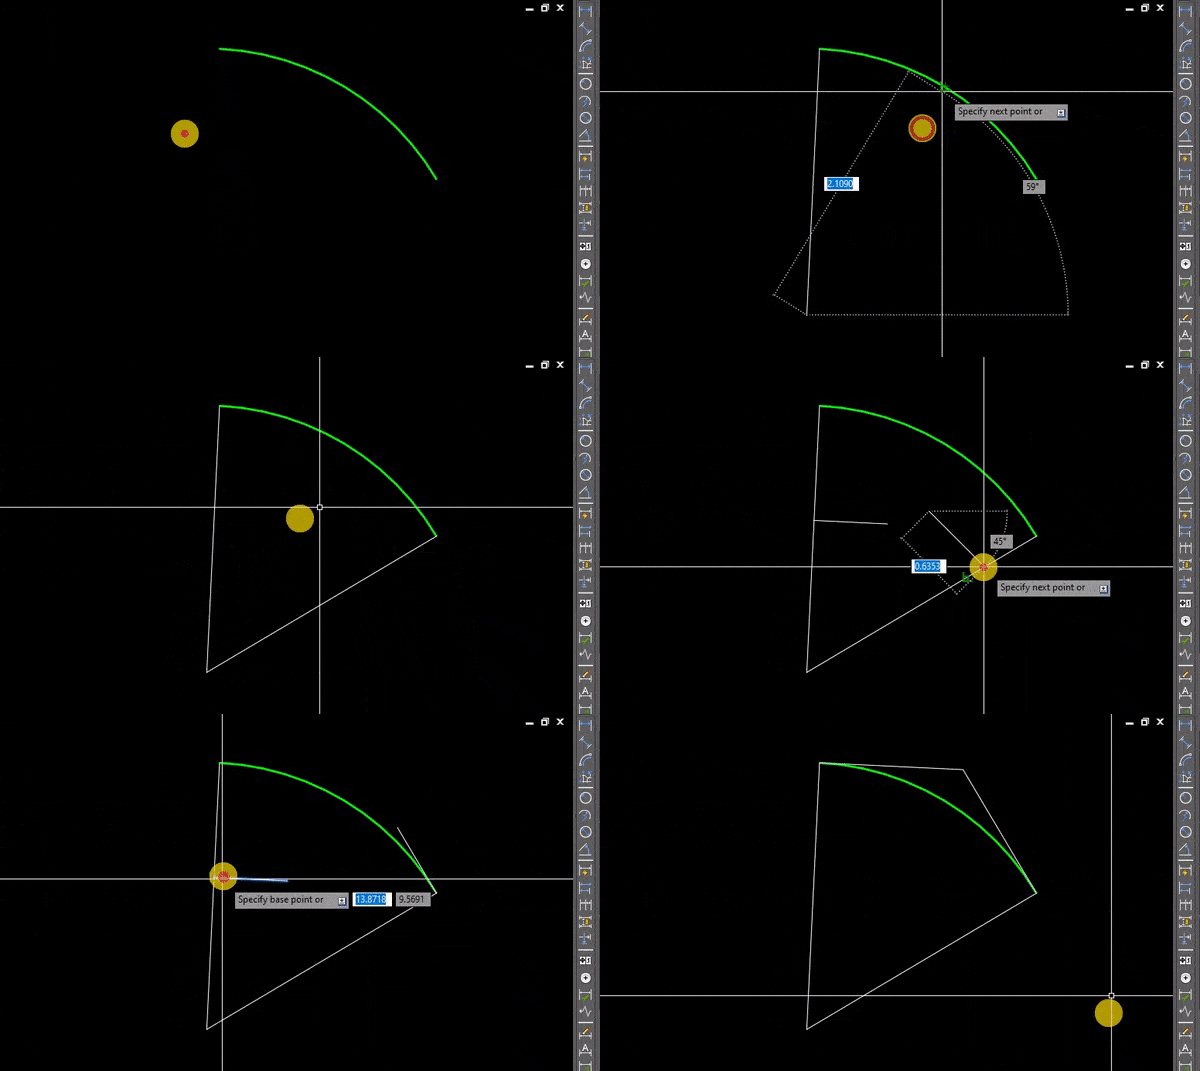
To draw the Point of Intersection of the Tangents of an existing Arc we will go through the following steps:
- First, Draw a Line from the Start of the Arc to the Arc’s Center point (Radius).
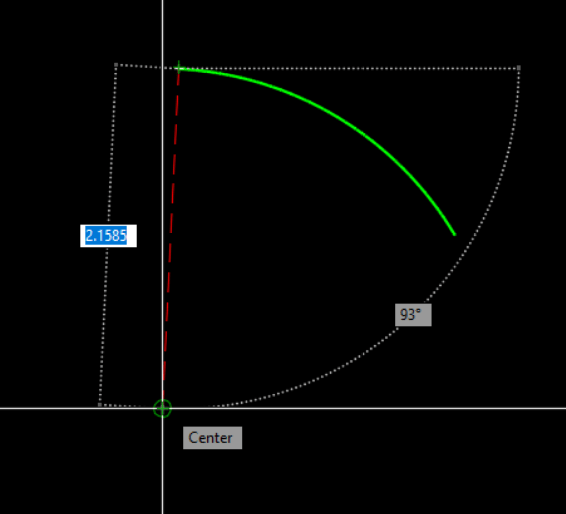
- Second, Draw a line from the end of the Arc to the Arc’s Center point (Second Radius).
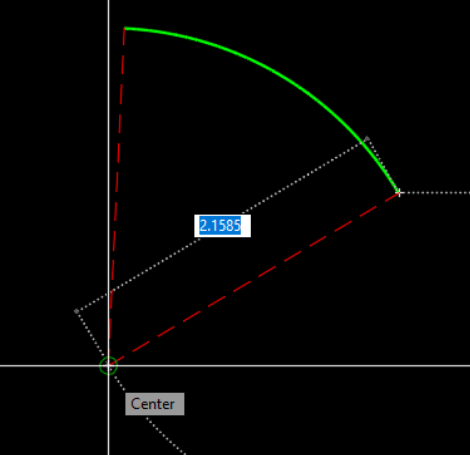
- Next, Draw lines perpendecular to the radius lines.
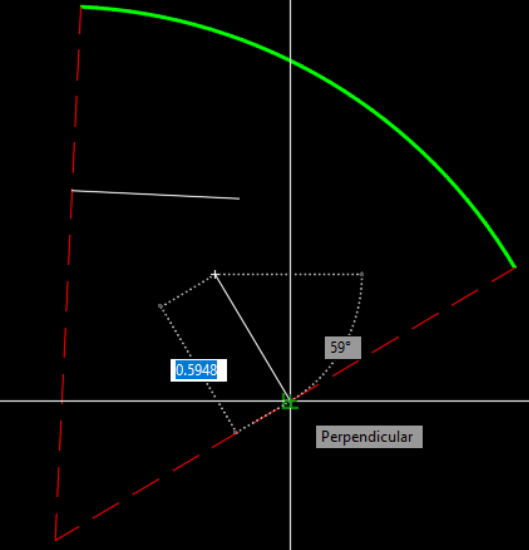
- Now, Move the Perpendecular lines to the end of the Radius. These are the Tangents of the curve.
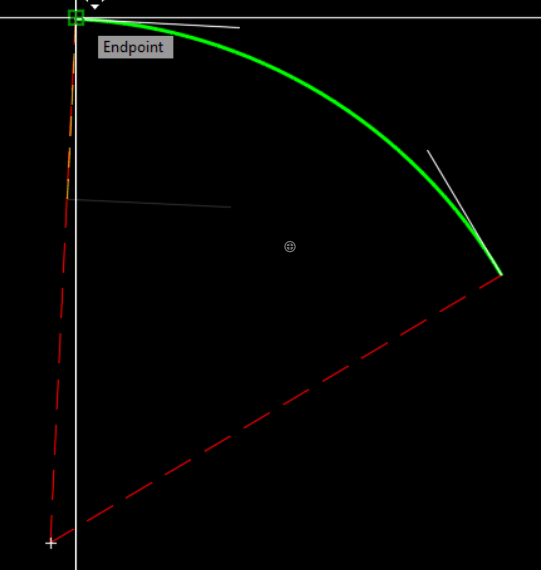
- Lastly, extend both lines, their intersection is the Point of Intersection of Arc Tangents.
This is the easiest way to draw the Tangent of Curve in AutoCAD and then draw the intersection of both Tangents.
How to Draw a Tangent Reverse Curve in AutoCAD using Circles
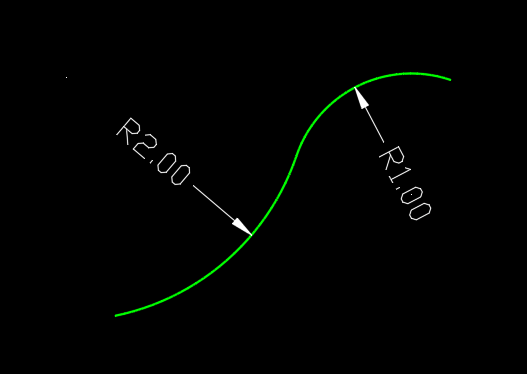
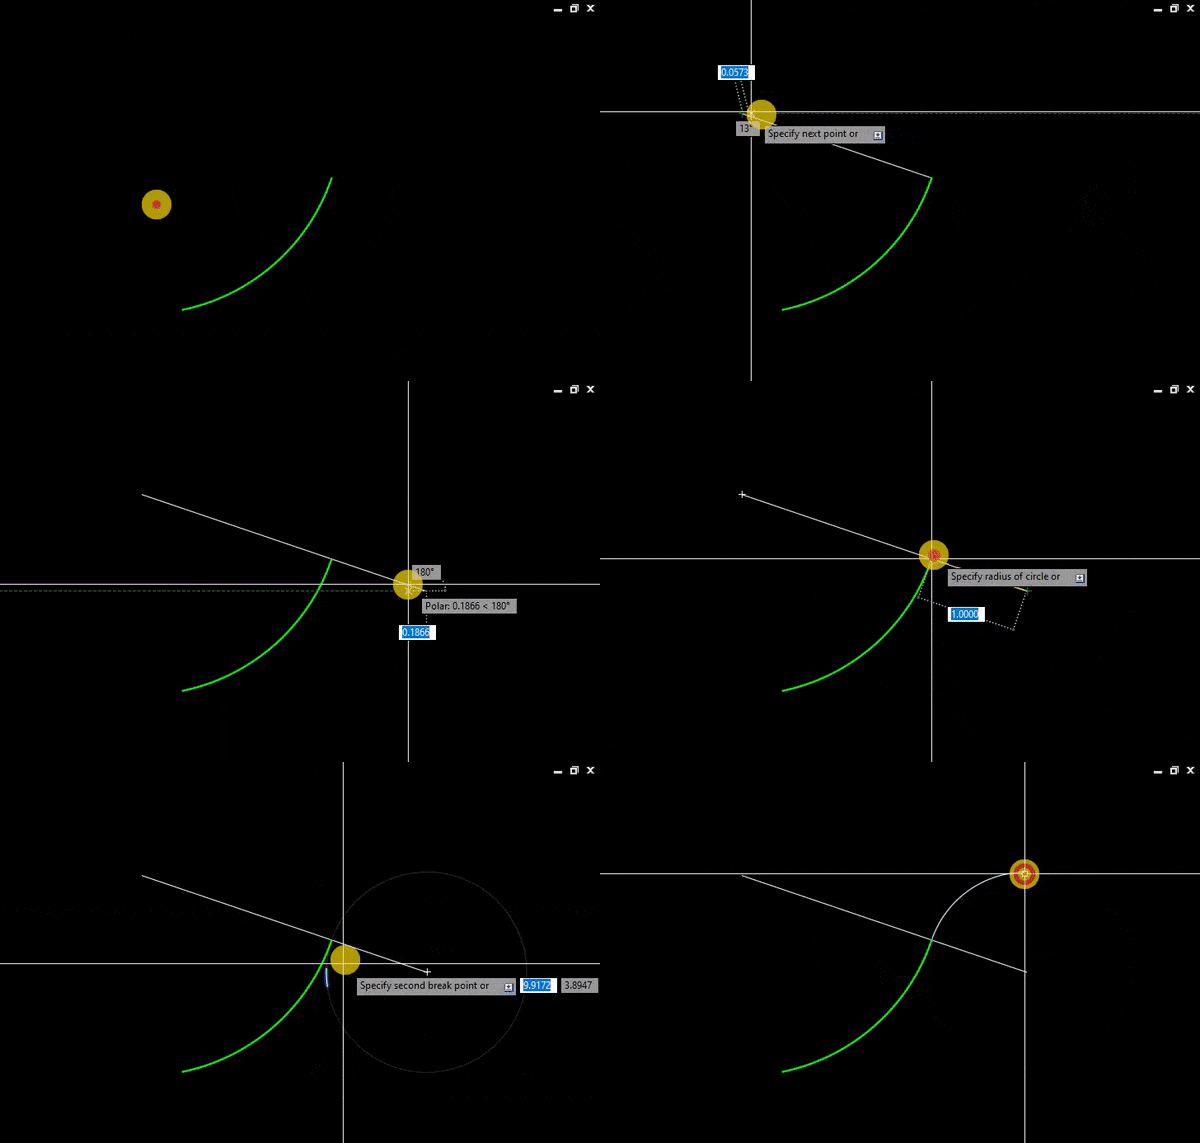
The last trick we will discuss today will be drawing a tangential reverse curve with a known radius. Again, the steps are as follows:
- Firstly, Draw a Radius from the end of the existing Curve.
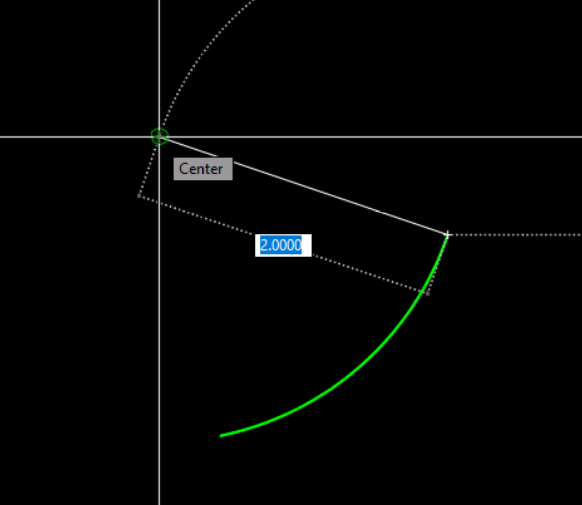
- Secondly, extend the radius line with the amount equal to the Reverse Curve Radius.
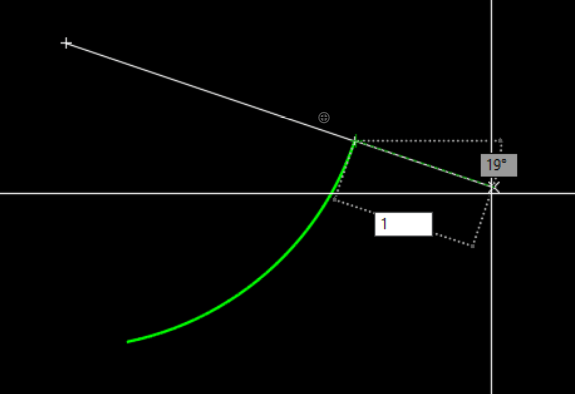
- Lastly, Draw a Circle the center of which is the end of the radius line.
In Conclusion…
There are a lot of different ways to draw something in AutoCAD. Arcs and Circles may seem complicated at first, but when you draw a few drafting will become easier and more intuitive.
Today we’ve learned how to Draw the Bisector of an Angle using a Circle, how to Draw the Point of Intersection of Arc Tangents, and How to Draw a Tangent Reverse Curve in AutoCAD using Circles. Let us know if you know easier ways to draw these elements in the comments below.
Don’t forget to check our other great AutoCAD Tips and Tricks!
Try it on your own drawing
TerraDraft Lite is free to download.