

It is quite a common task, to raise or lower the elevations of all vertexes of a feature line in a drawing. The reasons can be anything, from using the wrong benchmark to revisions by the client.
No matter the reasons, it is great to have the opportunity to automatically raise or lower vertexes by a constant with one click. However, is it possible to raise or lower the vertexes of multiple Feature Lines in Civil 3D at Once? The answer is big YES! To do that just go through the steps below.
- Select all the Feature Lines you want to Raise or Lower.
- Right Click on the screen and choose Raise/Lower…
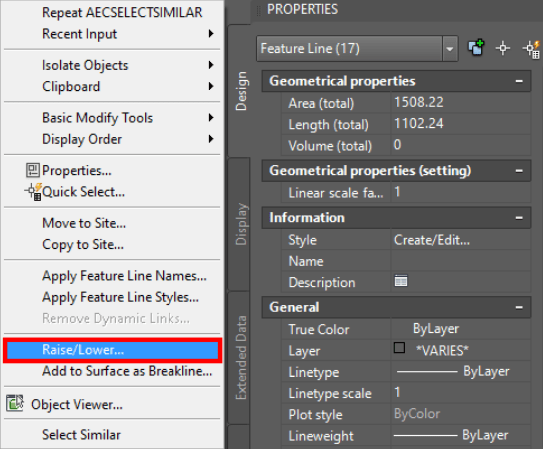
- AutoCAD will ask to Specify elevation difference. Here just enter the desired elevation to add or subtract from the elevations. Note: To subtract you need to enter minus before the number. For example, if you want to subtract 10 from all your elevations type in -10
That is all! You are all set, now all the elevations of the vertexes are raised or lowered with just 2 clicks!
If you want to learn more Civil 3D Tips & Tricks, check out our other AutoCAD Civil 3D posts!
When to use it
This helps when a whole set of feature lines must move up or down by the same amount. Typical cases are a benchmark that turned out to be wrong, or a revised finished floor or datum from the client. Changing each feature line by hand would take far longer and is easy to get wrong.
Tips and common mistakes
- Select every feature line first, then right-click. If you start the command with only one line selected, the other lines will not change.
- Enter the sign carefully. A plain number raises the elevations, and a number with a minus in front lowers them, so check the sign before you press Enter.
- The same value is applied to every vertex, so use this only when the whole line moves by one constant. If the grades must change, edit the vertexes individually.
Related tutorials
Try it on your own drawing
TerraDraft Lite is free to download.