
We all know and love our Fillet Command. Previously we have looked at the problems that may prevent us from being able to use it in Fillet is not working?. Today we are going to look at how to Fillet a corner without Trimming the original objects.
This method will leave the original objects intact and simply apply the fillet. It can also work for Chamfer!
So follow the steps below:
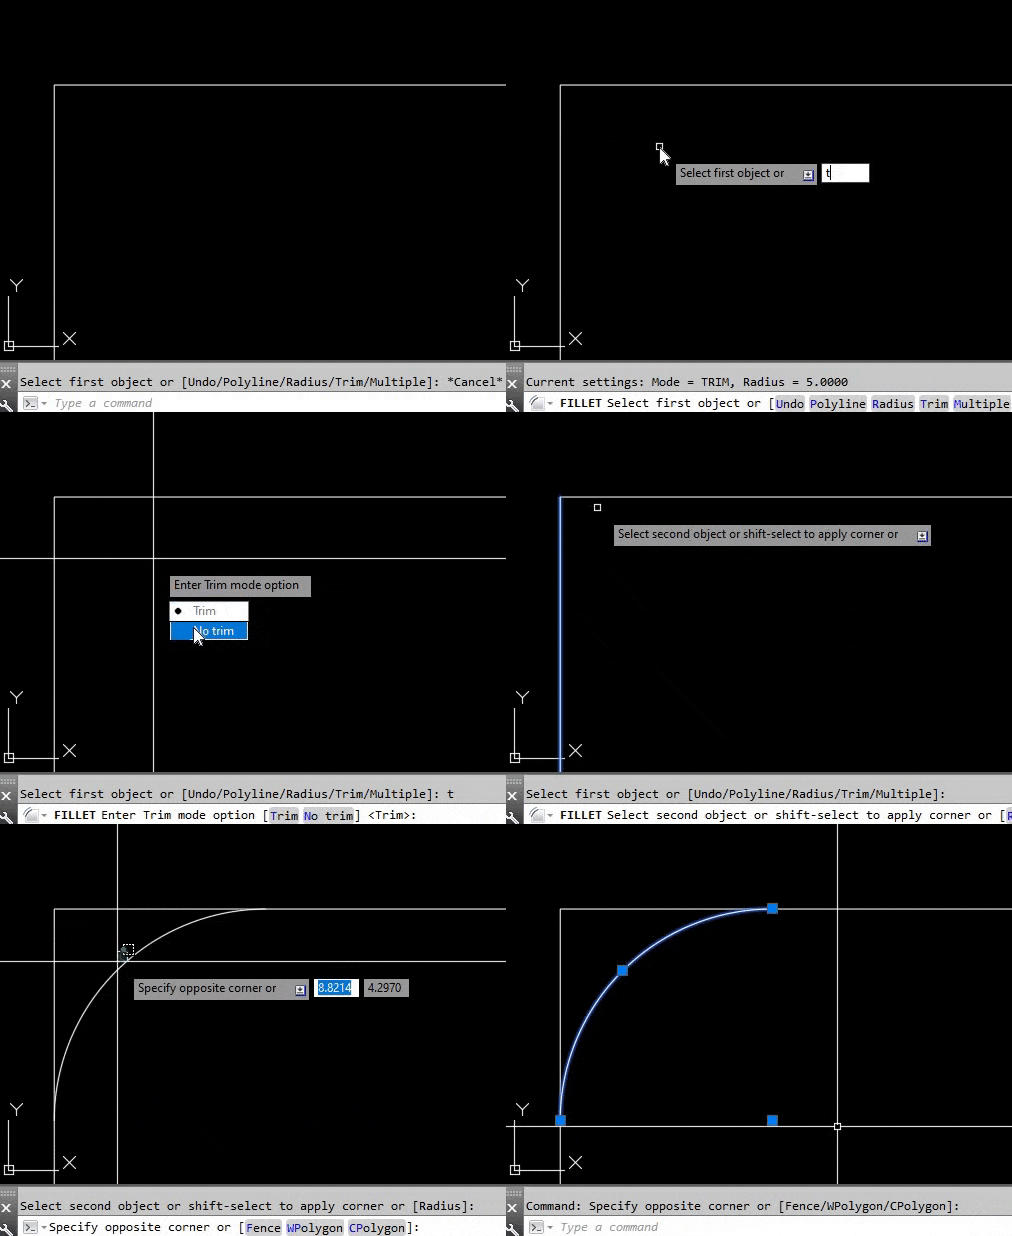
- Start the Fillet command.
- Type on the command line T to trigger Trim Mode.
- AutoCAD will prompt Enter Trim mode option [Trim/No trim] : type in N to choose No trim.
- Fillet the Corner.
As Easy as it is.
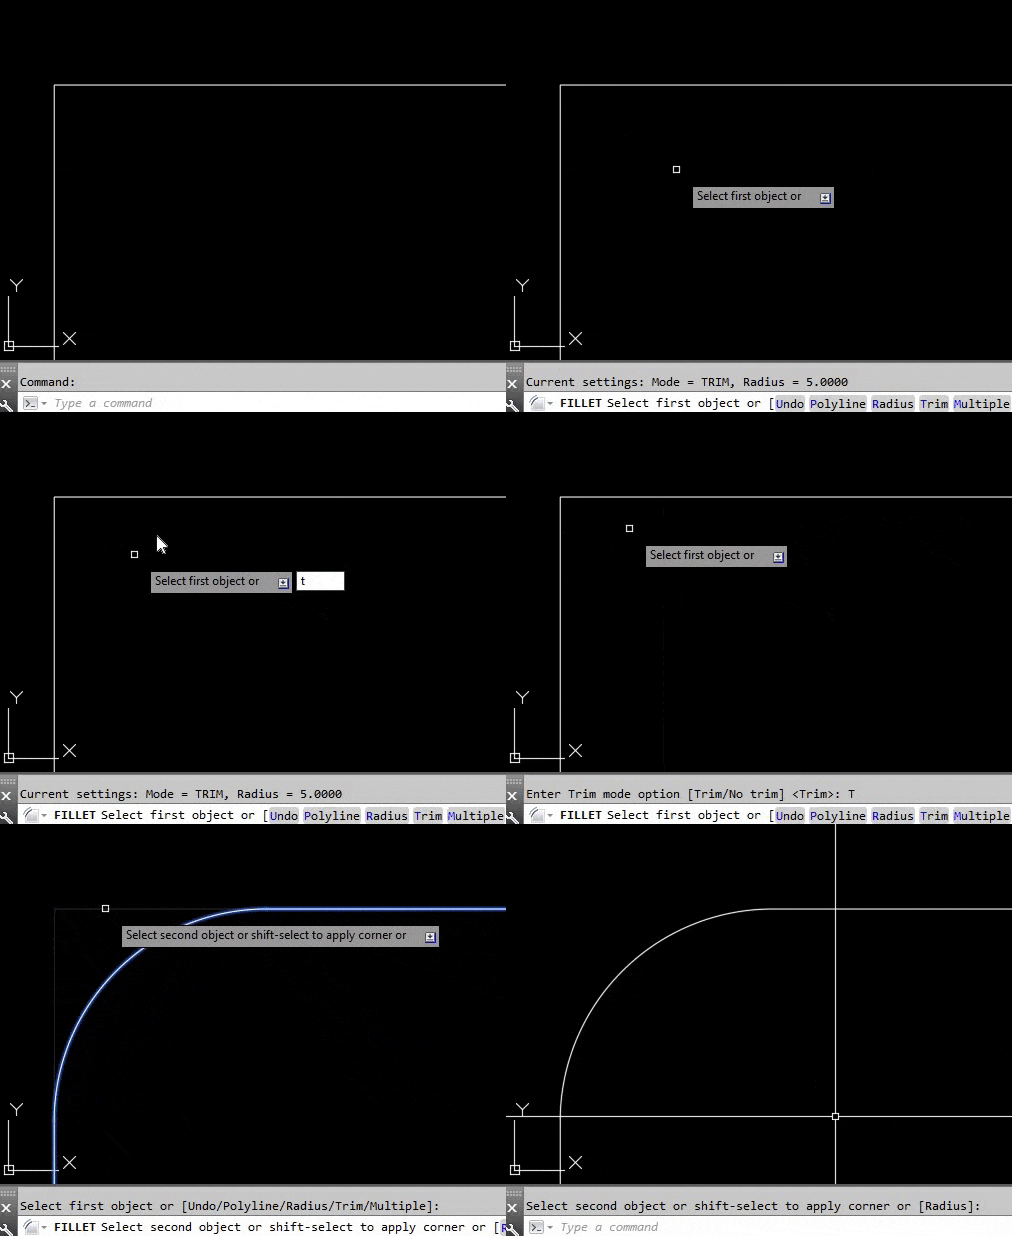
Fillet with Trim mode set to Trim (Normal Fillet behavior):
Fillet with Trim mode set to No Trim:
If you found this information useful. Don’t forget to check our other AutoCAD Tips for more great Tips and Tricks like this one!
When to use it
Use No trim when you want a rounded or chamfered corner but still need the original lines. This is common when you are testing a corner radius on a layout, or when the two objects must stay long enough to be edited, measured or trimmed manually afterwards.
Tips and common mistakes
- The No trim option is chosen inside the Fillet command with T, then N. If a later fillet trims your lines when you did not expect it, run the command again and check this setting.
- To go back to normal behaviour, type T again and choose Trim at the same prompt.
- With No trim, the old corner stays in the drawing next to the new arc. Remember to clean it up if the final linework should not overlap.
Related tutorials
Try it on your own drawing
TerraDraft Lite is free to download.