
In a previous post Create Separate Hatches Fast and Easy! We have discussed, how to create Separate Hatch objects as easy as possible. But what if, we or someone else has created Separate hatches and now we have to Join those hatch objects into one?
This can be applicable for example when there are lots of hatches and you would like to make selection easier, or to make the pattern uniform, or generate an outline…
Join Hatch in AutoCAD
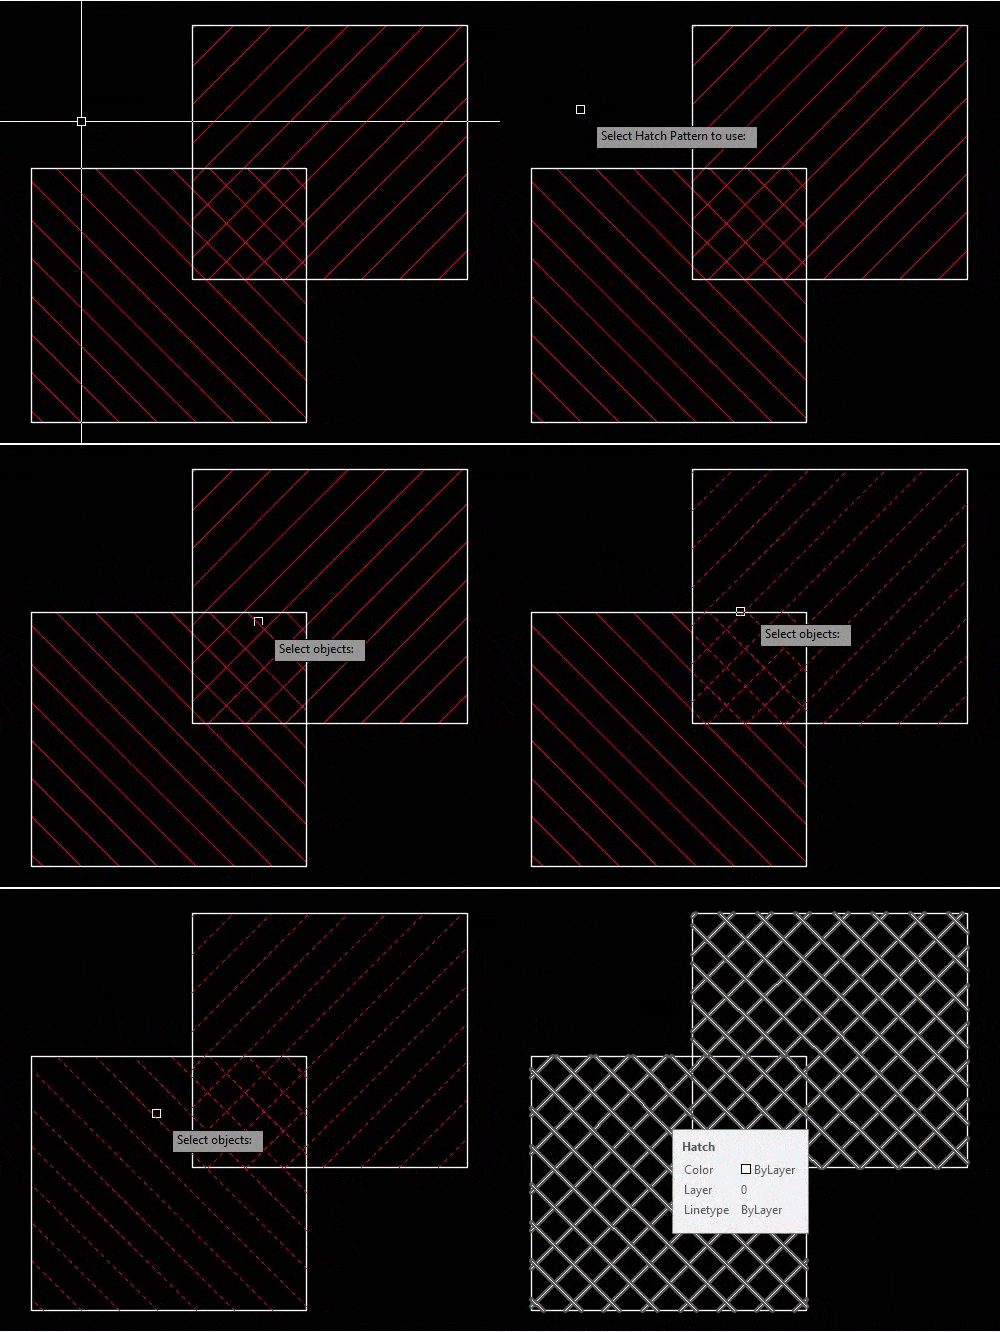
To complete the task of joining hatches together, we will go through a step by step process:
- Download a Lisp from here, and load it. (Learn How to use Lisp programs effortlessly)
- Start the Lisp by typing MHon the command line.
- AutoCAD will now ask you to select a hatch that contains the pattern you would like to use.
- Now select all the hatches that you want to be joined together. Note: Even though you already selected a hatch to specify what pattern to use, you need to select that hatch again so that it is included in the selection set for merging.
- Hit Enter to finish!
As easy as it is!
Find out more great AutoCAD Tips.
When to use it
Use this when a drawing has many small hatch objects that should act as one, for example after receiving a file from someone else or after hatching with separate objects. One hatch is easier to select, keeps the pattern looking uniform and is simpler to work with if you need an outline. It saves time compared with deleting the hatches and drawing a new one.
Tips and common mistakes
- Select the hatch with the pattern you want first, then select all the hatches to join. Remember to include that first hatch in the second selection as well.
- Load the LISP file before you type MH, otherwise AutoCAD will not know the command.
- Save a copy of the drawing before merging. If the result is not what you wanted, you can go back easily.
Related tutorials
Try it on your own drawing
TerraDraft Lite is free to download.